CHICKEN VINDALOO

For years I’ve been trying to make a good curry from scratch. I buy all of the spices to create flavored pastes, but there’s always something missing. Although my dishes are tasty, they are nowhere near as flavorful as what I’ve eaten in Indian restaurants. But thanks to my favorite spice store—Kalustyan’s on Lexington Avenue in NYC—they’ve done the hard work for me. I’m not a big proponent of semi-homemade dishes, but in this case, getting a little help is so worth it. They carry a line of different curry sauces that really add some zing to a dish. It also cuts the prep time down so much that you can make this dish in less than an hour.

INGREDIENTS

4 tablespoons olive oil or ghee

6 boneless, skinless chicken thighs, cut into 1” cubes

1 onion, sliced

1 red pepper, chopped into ½” cubes

3 cloves of garlic, minced

1” knob of ginger, minced

2 teaspoons of salt

1 teaspoon fresh ground pepper

1 ½ cups basmati rice

1-13.5 oz can coconut milk

1-12 oz jar of Kalustyan’s Vindaloo Spicy Curry

PREPARATION

Heat 3 tablespoons of olive oil or ghee in a large dutch oven. Add the chicken and brown for four minutes, flipping the chicken pieces over half way through. Remove from pot and set aside.

Add 1 tablespoon of olive, the onion and red pepper and sauté for 6-8 minutes or until onion is translucent and beginning to brown. Add the garlic and ginger and sauté until fragrant, about one minute. Season with salt and pepper.

Using a strainer, rinse the rice until the water runs clear. Shake the strainer to remove any excess water. Add the rice to the pot and stir until integrated.

Add the coconut milk and Vindaloo Spicy curry. Stir well. Add the chicken and stir. Bring up to a boil, then down to simmer. Cover the pot and cook for 20 minutes. Turn off the heat and let rest for 10 minutes.

Serve in bowls.


TEQUILA SURPRISE

In honor of Cinco de Mayo, it’s time to break out the tequila—my go-to liquor of choice for this and most other occasions. But rather than making an ordinary margarita—which I find way too sweet—I’ve come up with a variation that has a nice balance and a nice kick. I use pepper infused simple syrup to zip things up. Put on your brightest colors, grab a to-go cup and enjoy!

INGREDIENTS

2 oz Tequila

1/2 oz Cointreau

1/2 oz hot pepper syrup

1/4 english cucumber, very thinly sliced

1/2 lime, juiced

Ice

PREPARATION

Pour the tequila and half of the cucumbers into a shaker. Muddle the cucumber. Add the Cointreau, hot pepper syrup, lime juice and ice. Shake vigorously.

Wet a martini glass and shake out the excess water. Arrange six of the cucumber slices against the glass like polka dots. Pour in the contents of the shaker trying not to dislodge the cucumbers, but don’t worry if they slip into the drink. Add four cubes of ice to the glass. Garnish with one slice of cucumber.


WHAT’S UP DUCK?

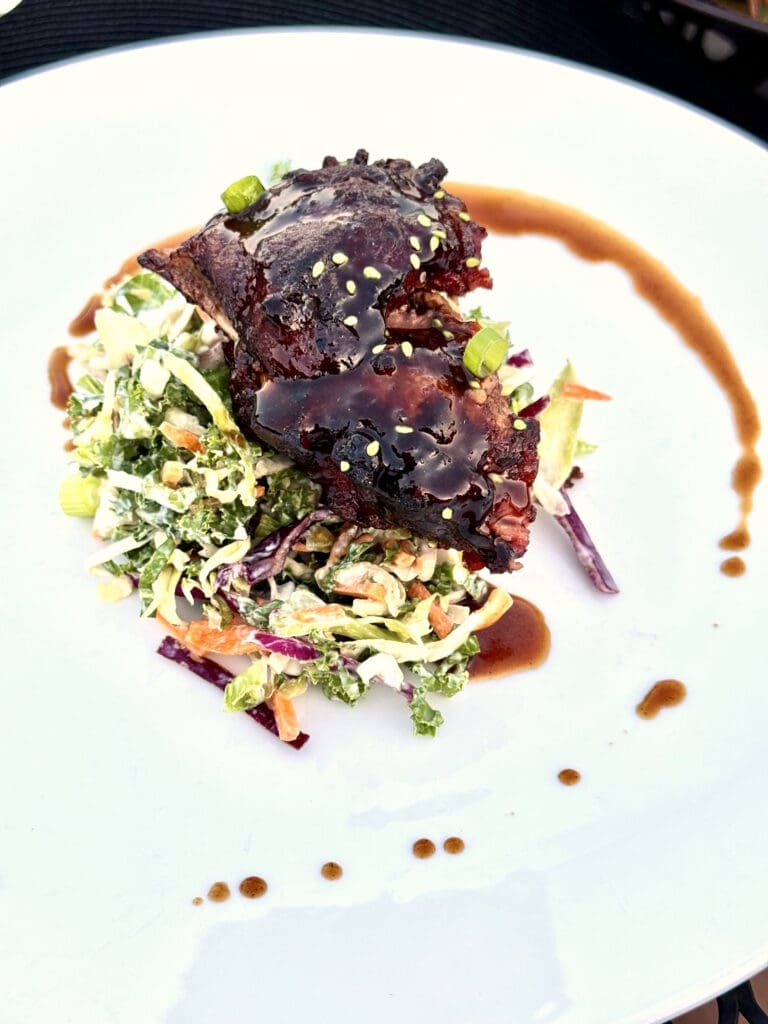
Okay, so I wanted to have a nice recipe ready to post for this week’s “Feed Me Fridays.” I had high hopes for this one considering I bought a beautiful duck breast from my local Greenmarket. I wanted to do an Asian spin on Duck a l’orange, so I worked out a nice marinade. Now all I had to do was cook it. Well—things didn’t go quite as expected.

I couldn’t remember the best technique so I scoured the “interweb” and came upon one that sounded sensible to me. It required scoring the fat, then searing both sides in a pan first and cooking the rest to temperature in the oven. 135 is supposedly medium rare, so I aimed for that.

I did everything as suggested, but after ten minutes in the oven as required, the internal temperature was nowhere near 135. So back inside the duck went. Eventually, doubling the time in the oven, the breast finally came to temperature.

I rested it and then began to slice it. My heart sank. I wasn’t slicing into a duck breast, I was slicing into a leather shoe. I had way overcooked it. Not only was the technique flawed, but I had made things worse by not believing the timing. It was an epic fail and I don’t think I deserve points for trying on this one. I attempted to make it look pretty on the plate, but as soon as we took a bite, there was a lot of heavy chewing going on.

The next day, I did a better job of scouring the internet and cross-referenced a few recipes for how to cook a duck breast. It seems there are a few varied options, none of which I actually accomplished. But I’ll give it a go again someday.

One note – the next day I sliced the leftover meat paper thin, put small pieces on crackers and topped them with some Brie. Into the microwave for 15 seconds and I had a very nice hors d’oeuvre. By slicing the meat so thin, I was able to distract people from having to chew so vigorously. As I always say, why waste?


BRIAN’S DUTCH BABY PANCAKE

For years on our annual family ski trips, all the adults have shared the cooking chores as the next generation did their part to devour everything in sight. But as time has marched on, the day has finally come when that generation has stepped up to the stove.

My young cousin Brian—who has always been an enthusiastic eater—has perfected this no fuss Dutch Baby Pancake recipe. I admire his practicality of messing up only one pan by just placing all the ingredients directly into the baking dish and mixing it all together. His philosophy—why dirty an extra bowl if you don’t have to?

He’s also adaptive. We were staying at a rental house and the closest thing to a baking dish was an old style roasting pan. Now, I don’t know if it was the oval shape or what, but the pancake did rise in a most unusual pattern. We all agreed it resembled the Rocky Mountains that surrounded us and it was meant to be. It certainly didn’t affect the flavor—the dish was delicious and gone within minutes.

INGREDIENTS (serves 4)

4 tablespoons butter, melted

6 eggs

1 cup milk

1 teaspoon vanilla

1 cup flour

1 dash salt

zest of one lemon

Confectioners sugar (for garnish)

Lemon juice (for garnish)

Maple syrup (for garnish)

PREPARATION

Preheat oven to 400 degrees. Using a 9 x 12” baking dish, place the butter in the pan and melt it in the oven. This is not only a critical ingredient, but it will also serve as a way to grease your pan too. Once melted, remove from oven and allow to cool for a few minutes. Add a small amount of milk and stir to make sure butter has cooled down. Add the remaining milk, eggs and vanilla and combine.

Add flour, salt and lemon zest. Mix until all ingredients are combined and there are no lumps.

Bake for 25 to 30 minutes until it’s fluffy and edges are golden brown and curling over.

To serve, cut into pieces and sprinkle with confectioners sugar, a few drops of lemon juice, and as much maple syrup as desired.


EASY DIM SUM

Try as I might, I’m all thumbs when it comes to shaping dim sum. Even though it tastes pretty good, it NEVER looks as good as it does in the restaurant. But I found this nifty inexpensive press that makes me look like a pro. All you have to do is place a wonton wrapper over the gizmo, put a tablespoon of filling in the middle, then just close and crimp to seal in the filling. After steaming them, I like to pan fry them to get a nice crispy bottom.

INGREDIENTS (Makes approx. three dozen pieces)

1 package dumpling wrappers

1 lb ground pork

1 large bunch Chinese chives chopped

1 teaspoon garlic, minced

1 teaspoon ginger, grated

1 tablespoon oyster sauce

2 tablespoons light soy sauce

1 teaspoon sesame oil

1 teaspoon sugar

½ teasoon white pepper

½ teaspoon five spice powder

¼ teaspoon salt

3 tablespoons canola oil

PREPARATION

Place pork in a bowl with your chopped chives, garlic, and ginger. Season with oyster sauce, soy sauce, sesame oil, sugar, white pepper, five spice powder, and salt.

With your hands, mix until the ingredients are thoroughly incorporated.

Place a dumpling wrapper centered on the dim sum press. Place 1 tablespoon of filling in the center of your dumpling wrapper. Wet the edges with water, then using the dim sum press, crimp together one end to the other.

Place a bamboo steamer basket in a wok. Fill the wok with water up to the bottom of the basket. Bring the water up to a simmer. Place the dumplings inside the steamer. Don’t crowd them and don’t allow them to touch. Cover and allow to steam for ten minutes.

Heat a large skillet with canola oil. Remove the dumplings from the steamer and place in the skillet. Pan fry each side for 1-2 minutes.


SEA URCHIN AND QUAIL EGG BOWTIE PASTA

Admittedly, this dish may not be for everyone. But for those of us that love sea urchin, otherwise known as uni at your local sushi bar, this dish is a rich treat—rich in flavor, but unfortunately rich in expense. I had purchased a tray at my local fish store with hopes of making my favorite sushi at home—uni with quail egg. But as you may have read earlier this week, things didn’t work out as planned. So, I found myself left with a half tray of uni and a half-dozen quail eggs that I was determined not to waste. So, I put it to good use in this dish.

INGREDIENTS (serves 2)

5 ounces fresh sea urchin (uni)

1/2 cup crème fraîche

½ pound bowtie pasta

2 tablespoons olive oil

3 cloves garlic, finely minced

1 small shallot, finely minced

1 teaspoon red pepper flakes

1/2 cup dry sake

6 quail eggs, beaten

Freshly ground black pepper

Salt to taste

Parmesan cheese, grated (optional)

PREPARATION

Reserve 2-4 pieces of sea urchin for the garnish. Put the remaining sea urchin, and crème fraîche into a blender and blend until smooth. Set aside.

Cook pasta as per box or bag instructions, remembering to season the water with salt. Cook until al dente.

In a large skillet, heat the olive oil. Add the shallots and garlic and cook until translucent, about 2-4 minutes. Add salt and pepper to taste. Add in red pepper flakes. Do not allow to burn.

Strain the pasta, reserving a cup of the pasta water if needed later. Add a ¼ cup of the pasta water into the blender and pulse the uni mixture.

On a medium flame, add the pasta to the skillet and using tongs, toss lightly to combine. Add the uni mixture and gently toss to combine. Bring pan up to high heat and pour the eggs over the pasta and toss. If sauce seems too dry, add some more of the pasta water, a ¼ cup at a time, until the consistency is creamy. (Go slowly so that you don’t add too much water to the sauce.)

Re-season to taste with salt and black pepper.

Serve pasta in bowls and garnish with the reserved sea urchin.

OPTIONAL: Garnish with grated parmesan. There’s a huge debate about whether to mix seafood with cheese. Classically it’s a no-no, but I leave it up to your tastebuds.


DON’T TRY THIS AT HOME

I know we’ve all felt the pinch of inflation over the last few years. When eating out, I find myself ordering half as much, yet everything costs twice as much as it used to. Sadly one of my favorite dishes at our local sushi restaurant has gone over the top. $18 for one piece of uni and quail egg sushi. Granted, for me it’s one of the best bites on earth, but it does seem a little steep. So I decided to try my hand at making it on my own.

I’m always trying to rationalize buying extravagant things. A tray of uni (sea urchin) from our local fish store is $50. But, that will make at least 12 pieces of uni sushi. So, had I eaten 12 pieces at my local sushi bar, I would have paid $216. So $50 seems like a bargain. (You see how my mind works?)

Quail eggs, sushi rice and nori are relatively reasonably priced, just good luck finding them when you need them. I had noticed my local gourmet shop was carrying quail eggs, so I didn’t think to buy them until I needed them and of course, when I did, they were out. So I had to schlep to their sister store a half-mile away. Of course, I live in a trendy neighborhood in Brooklyn that of course would have quail eggs. I do realize that outside of my NY bubble, that might not be the case, so plan ahead.

Back home with all the ingredients, it was time to give it a go. I have great respect for sushi chefs and know that it takes years of practice to make it correctly. I had no illusions that mine would look as appealing as theirs, but I had hoped that at least it would taste as good. I have my trusty sushi mat, my Japanese rice cooker, some pre-cut nori. How hard could this be?

I’ve been studying how our local sushi chef creates his delectable bites for over thirty years. So why can’t I remember if he molds the rice first and rolls the nori around it or if he makes the nori circle and then adds the rice into it. Oh boy. I try both ways, but the rice is still so hot I can’t really mold it tightly. Eventually I make some semblance of a base with my goal that it doesn’t collapse. I add in a few pieces of uni on top. Ok, so far, it’s holding. Now I need to separate the quail egg yolk from the whites. Our sushi chef just opens the egg in his hand and lets the whites drip out under his fingers. It sort of works, but there’s still too much white left as I gently plop the yolk next to the uni.

Now for the true test—tasting it. Normally this dish transports me to another universe. The unctuous taste of the uni paired with the creaminess of the quail egg is so sublime, I usually sigh when eating it. So, there’s a high bar I’m hoping to reach. I raise the first piece to my mouth, and take it in whole as I gently bite down for the taste explosion—and—nothing. It’s not that it’s bad, it’s just not anywhere near as good as I had hoped. First of all, the rice isn’t right. I did use sushi rice, but it probably wasn’t as high a grade as it needed to be and I didn’t have the right vinegar seasoning. It was way too bland. The nori was a little soggy because I don’t have the experienced touch. The uni was good, but not as great as it could have been. Although I spent $50 on the tray, one could pay up to $150 for superior quality uni. And lastly, there was too much of the whites from the quail egg muddying up the flavor.

So, now I have a half tray of of uni and six quail eggs left and nothing to do with them. Wait a minute—do I smell a pasta dish coming on?


ORANGE CHOCOLATE RICOTTA CAKE

I love a good sale, and when I found a 32 oz. tub of ricotta cheese in the market for $2.99, I couldn’t just pass it by. So after making a lasagna, I still had tons of the ricotta left. So although I’m not much of a baker, I thought maybe a dessert would be nice. Who doesn’t like orange and chocolate? This recipe worked out surprisingly well. Give it a shot and let me know what you think.

INGREDIENTS (Serves 8)

1 ½ sticks unsalted butter, softened (room temperature)

1 ½ cups sugar

15 ounces whole milk ricotta cheese (room temperature)

3 large eggs (room temperature)

1 teaspoon vanilla

1 tablespoon Cointreau

2 large oranges, zested, plus the juice of one orange

½ teaspoon baking soda

½ teaspoon salt

1 ½ cups flour

¾ cup chocolate chips

powdered sugar and chocolate shavings for dusting top of cake (optional)

PREPARATION

Grease a 9-inch springform pan with butter and powdered sugar. Set aside.

Preheat oven to 350 degrees.

Cream together the butter and sugar until combined in a large stand mixer using the whisk attachment. Add in the ricotta cheese and blend until light and fluffy, about 4 to 5 minutes.

Mix in the eggs, one at a time. Add in the Cointreau, orange zest, orange juice, and vanilla. Mix to combine. Add in the baking soda and salt and combine. Lastly, add in the flour and mix until all of the ingredients are fully combined, scraping the sides of the bowl if necessary. Remove the bowl from the stand and fold in the chocolate chips.

Pour the batter into the prepared springform pan. Bake for 45-55 minutes, or until the cake is set and a toothpick inserted in the middle of the cake comes out clean.

Let cool in pan for 20 minutes before removing from the springform pan. Cool an additional ten minutes and dust with powdered sugar and chocolate shavings before serving.


LAMB STEW GREEK STYLE

Looking for a new idea for your Easter lamb? Here’s a hearty dish that got a thumbs up from my neighbors. I often use this cut of lamb for a cassoulet, but I wanted to try a different flavor profile. By simply changing some of the spices to a more Mediterranean leaning and subbing out orzo instead of beans, this transformed into a completely different dish. It’s also a great meal if the family is coming over. You can make most of it the day before and just add the orzo 20 minutes before you’re ready to serve. Now you’ll have more time to spend with everyone at cocktail hour. (And no, those aren’t mini-marshmallows on top in the picture. It’s feta cheese!)

INGREDIENTS (Serves 6)

2 pounds lamb shoulder, fat trimmed, cut into 1” cubes

3 tablespoons olive oil

salt and pepper

¼ cup flour

2 onions, sliced

1 large carrot, diced

2 ribs celery, diced

4 cloves garlic, minced

½ teaspoon cinnamon

½ teaspoon nutmeg

1 teaspoon oregano

1 teaspoon paprika

½ teaspoon cayenne pepper

2 bay leaves

1 ½ cups white wine

1 28-ounce can fire roasted crushed tomatoes

1 cup orzo pasta

fresh parley, chopped for garnish

1 lemon, zested for garnish

Feta cheese, for garnish

PREPARATION

Generously season the lamb with salt and pepper. Dredge in flour, making sure to shake off any excess.

Add olive oil to a large Dutch oven over medium-high heat. Brown the lamb pieces, making sure not to crowd them. You may need to do them in batches. Each batch should take about 8 minutes to brown. Transfer the meat to a plate and set aside.

Add the onions, carrots and celery and sauté for six to eight minutes. Add the garlic, cinnamon, nutmeg, oregano, paprika, cayenne pepper and bay leaves and stir to combine for one minute. Season with salt and pepper.

Add the lamb back in along with the white wine and crushed tomatoes. Cover and bring to a boil and then reduce to a simmer for one-hour. (If you’re making the day ahead, stop here. Let cool and refrigerate overnight. The next day, reheat by bringing back up to a boil and then reduce to a simmer.)

Add orzo to the pot, cover, and stir to combine. Allow to cook for twenty minutes. Remove the bay leaves.

When done, stir to combine.

Serve in bowls and garnish with parsley, lemon zest and feta cheese.


GRILLED SALMON OVER FRIED RICE

I hate wasting food, so when I found some leftover rice, a half package of spinach and some other bits and pieces in the fridge, I knew I had the makings of a quick fried rice. I topped it with some grilled salmon and I had dinner on the table in less than thirty minutes. Quick, easy and yummy—enjoy!

INGREDIENTS (Serves 2)

MARINADE:

2 tablespoons soy sauce

1 tablespoon of mirin

1 teaspoon of fish sauce

1 tablespoon of maple syrup

2 pieces of salmon filet (6 oz each)

salt and pepper

RICE:

2 tablespoons olive oil, (plus 2 to cook salmon)

1 onion, diced

3 cloves garlic, minced

6 cremini mushrooms, sliced

1 cup cooked rice

1 tablespoons soy sauce

1 teaspoon of mirin

1/2 teaspoon of fish sauce

2 cups spinach

1 egg, beaten

salt and pepper to taste

Scallions for garnish

PREPARATION

Season the salmon filets with salt and pepper and place in a Ziploc bag. Combine the other marinade ingredients in a bowl. Pour into Ziploc bag and seal, making sure to let out the air. Massage the marinade around the fish. Place in refrigerator for two hours.

Heat a wok or a large skillet. Add two tablespoons of olive oil. Add onion and sauté until it begins to brown, about 6-8 minutes. Add in the mushrooms and garlic and cook for one minute. Add in the cooked rice, soy sauce, mirin and fish sauce and stir. Simmer for five minutes. Add the spinach and allow it to wilt down. Stir into rice mixture. Turn off heat.

Heat a grill pan on medium high. Add 2 tablespoons of olive oil and spread on grates with a paper towel. Place the salmon filets skin side up on the grill pan. Cover pan with a pot lid. Cook for 4 minutes. Flip salmon filets over, cover and cook for another 4 minutes. (There still should be a little pink on the salmon. If you like it well done, cook for six minutes each side).

While the salmon is cooking, reheat the rice. Add the beaten egg and combine with rice mixture. Season to taste with salt and pepper.

To serve, place rice in center of plate and top with salmon filet. Garnish with scallions.