Posts by The Katz Tales
TURMERIC SHRIMP WITH SPINACH
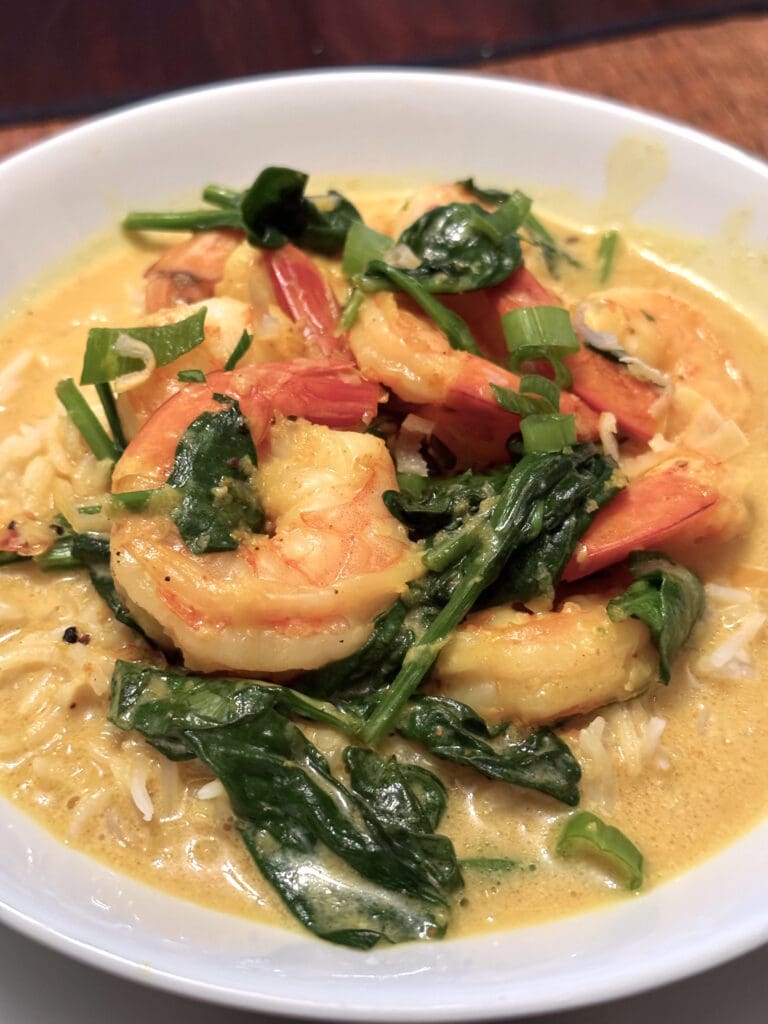
I love working with turmeric, even if it stains my fingers for the next couple of days. I love the color it adds to a dish, not to mention the flavor. For those of you that can’t get enough shrimp, this recipe is for you! INGREDIENTS (Serves 4) FOR MARINADE1 teaspoon ground turmeric 1 teaspoon…
Read MorePASTA WITH PARMESAN MUSHROOM SAUCE
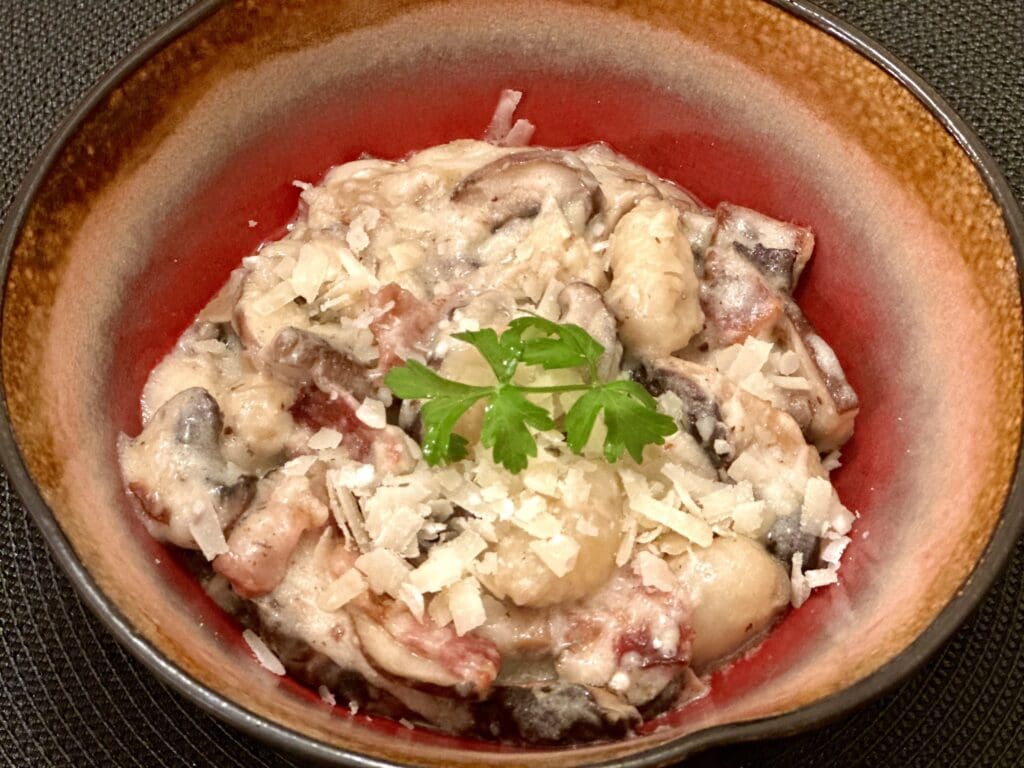
I know this is sacrilege, but I’m not a big fan of tomato based pasta sauces, mostly because they give me terrible heartburn. So, I’m always trying to think of new sauces to create. I was playing around with some ideas, and I thought I’d do a spinoff of an Alfredo sauce, but not quite…
Read MoreSKATE WING WITH SPINACH PROVENCAL
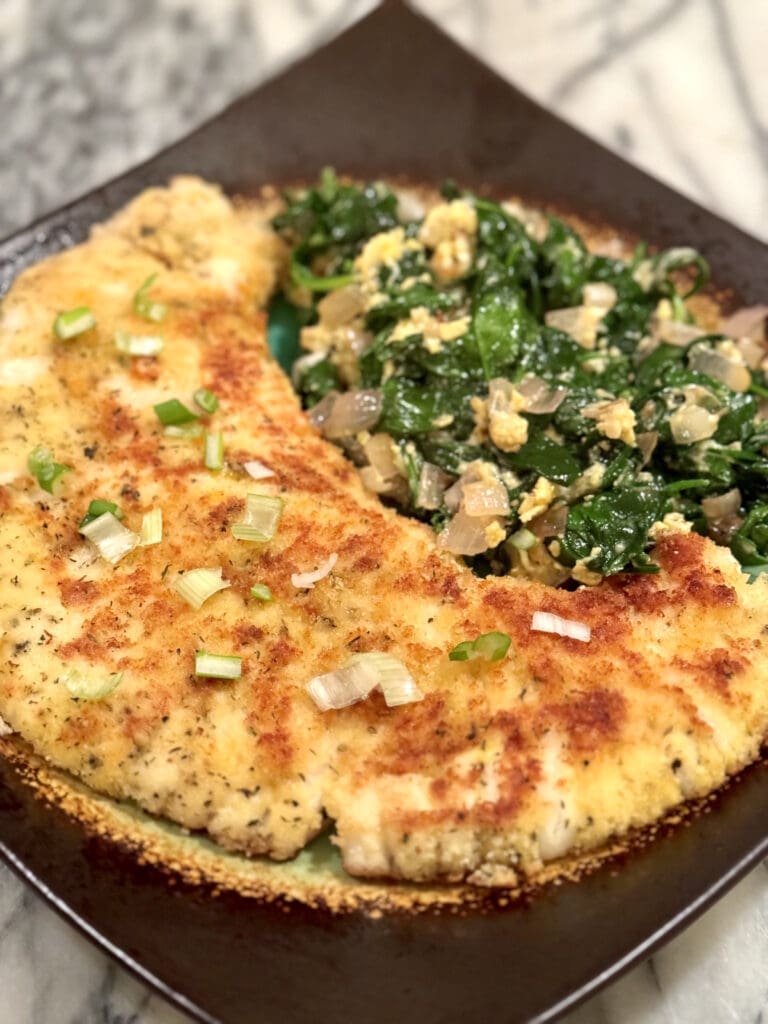
Have you ever gone into your local fish market and seen that weird looking fish that looks sort of like a fan? Well, that’s skate wing. It’s a surprisingly inexpensive fish considering how delicious it is. It’s a light, succulent fish that holds up beautifully when sautéed in butter. It’s part of the ray family…
Read MoreCHICKEN KORMA

My favorite Indian dish is Chicken Korma. Try as I might, I never quite get it to taste as good as my local Indian restaurant, Bombay, but I’ve been working on my recipe for years, so this is pretty close. I like to serve it with some basmati rice on the side. INGREDIENTS FOR MARINADE1…
Read MoreCHOCOLATE RASPBERRY OATMEAL COOKIES

Although my husband is the baker in the family, sometimes I like to hover over him with suggestions. He was craving oatmeal cookies and I thought it might be fun to try to make them like pinwheels, putting raspberry jam on the rolled out dough. Although they didn’t end up looking like pinwheels, they did…
Read MoreBAKED BRIE IN PUFFED PASTRY

This may look like it took some time to do, but in fact, it’s one of the easiest recipes I’ve ever made. It’s also a huge crowd pleaser. When I’m having guests over and I want them to think I fussed—but in reality I have no time—then this is my go-to welcoming dish. It’s great…
Read MoreMUSSEL STEW
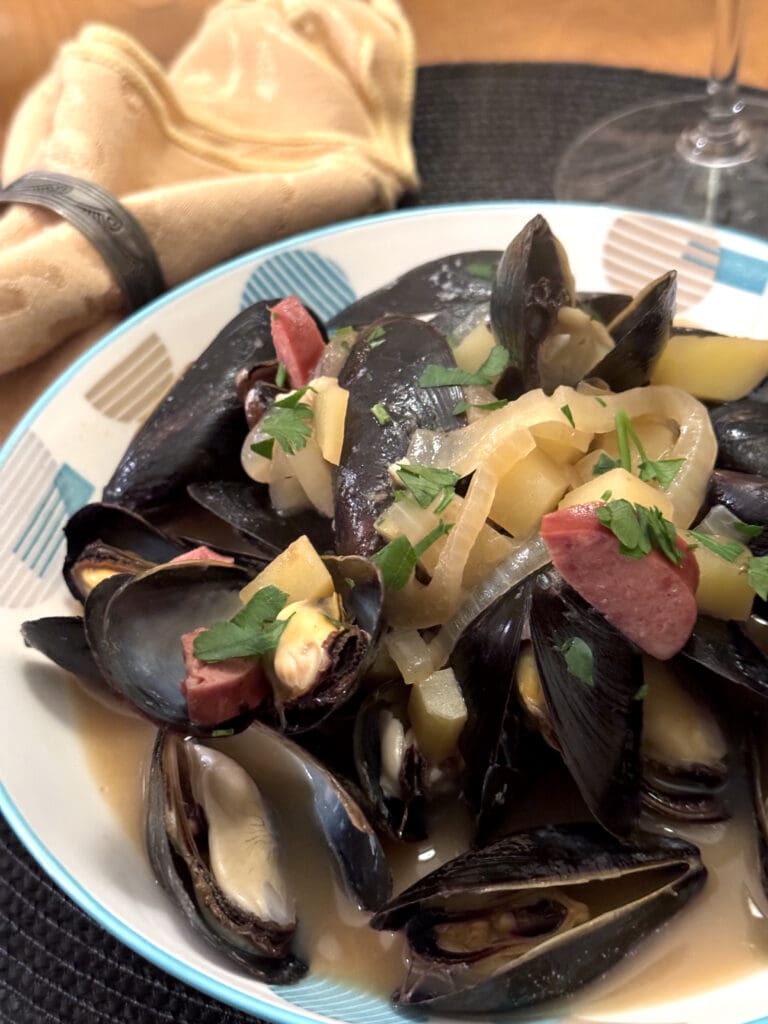
As much as I love making my own broth, sometimes I just don’t have the time. There are some great boxed soups out there and every once in a while I try a new flavor and see what I can do with it. This mussel stew paired really well with Potato Leek Soup. It’s a…
Read MoreCREAMY MUSHROOM SOUP
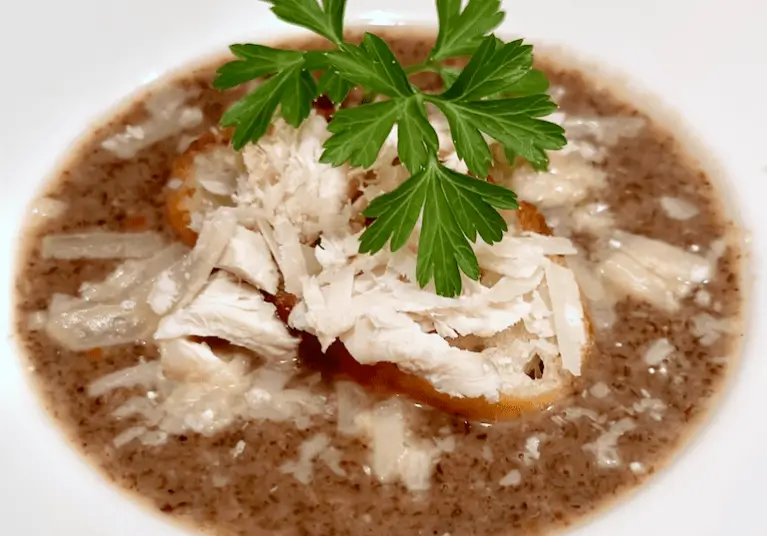
We’re big mushroom lovers in our house, so I love to use them whenever possible. Here’s a recipe for a delicious, elegant soup that really features that unmistakable mushroom flavor. Enjoy! INGREDIENT (Serves 6) 1 cups dried porcini or shiitake mushrooms2 cups warm water3 tablespoons olive oil12 fresh cremini mushrooms, sliced1 sweet onion, chopped2 cloves…
Read MoreThanksgiving Leftover Casserole

I went a little nuts this year and made twice as much of everything as I needed to feed my family. Admittedly, I love Thanksgiving leftovers, so somewhere deep in my psyche I knew what I was doing. If you’ve made the classics—turkey, stuffing, mashed potatoes, some green thing, cranberry sauce, and gravy—then this recipe…
Read MoreINSIDE/OUTSIDE STUFFING
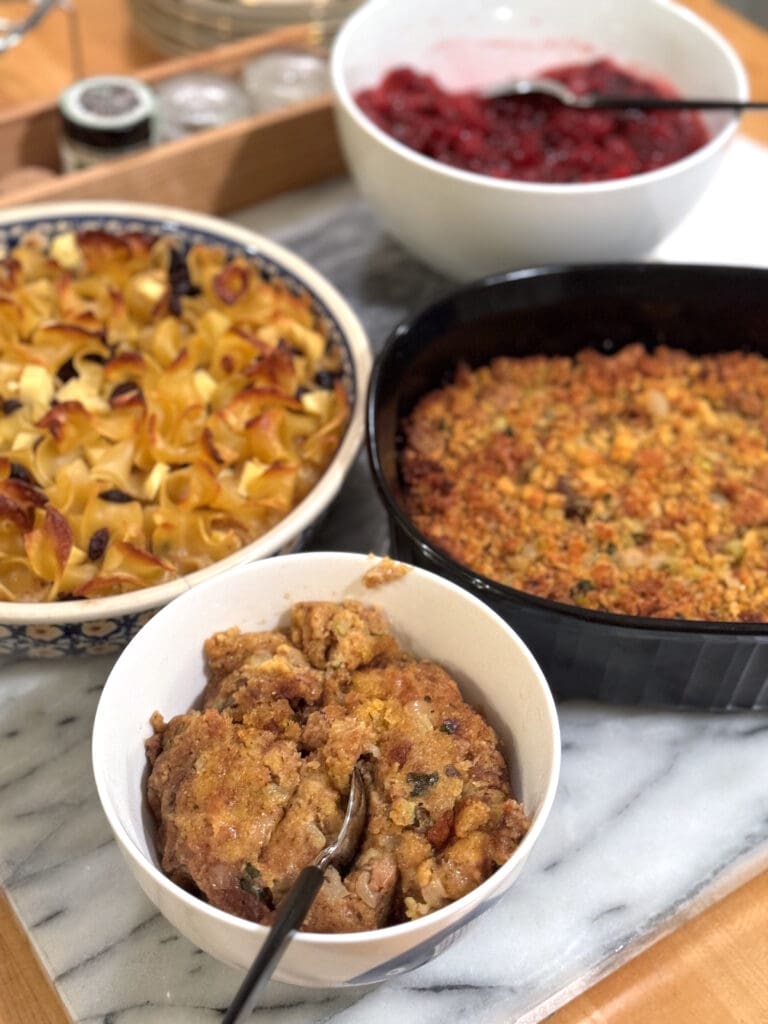
Across America, there continues to be the great debate—is stuffing better when it is cooked inside the turkey or just in a baking dish? For most of my family and me, we are definitely inside bird people and find the stuffing to be much moister than when it is cooked outside of the bird. But…
Read MoreCHICKEN MOLE SOUP
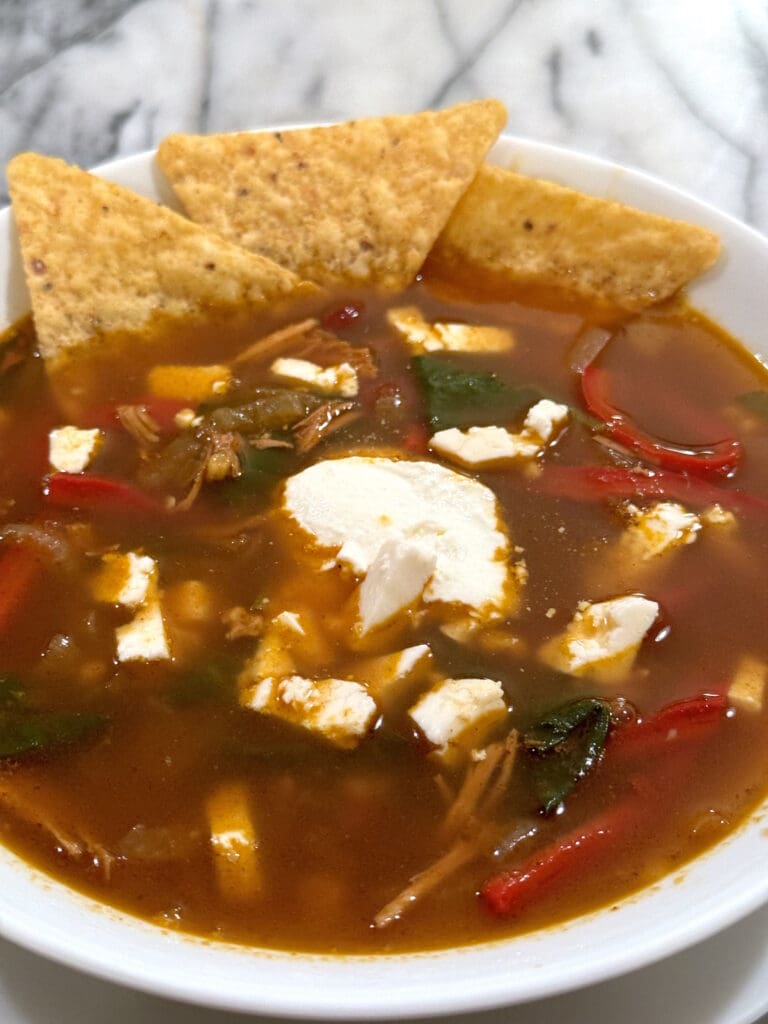
Making mole from scratch is quite a daunting task. I once took a cooking course in Mexico and there were over 26 ingredients to the recipe. It was fun to do, but sourcing all the right ingredients, not to mention the long cooking process, isn’t always practical. But, there are some fantastic mole pastes on…
Read MoreGRILLED SALMON OVER FORBIDDEN RICE
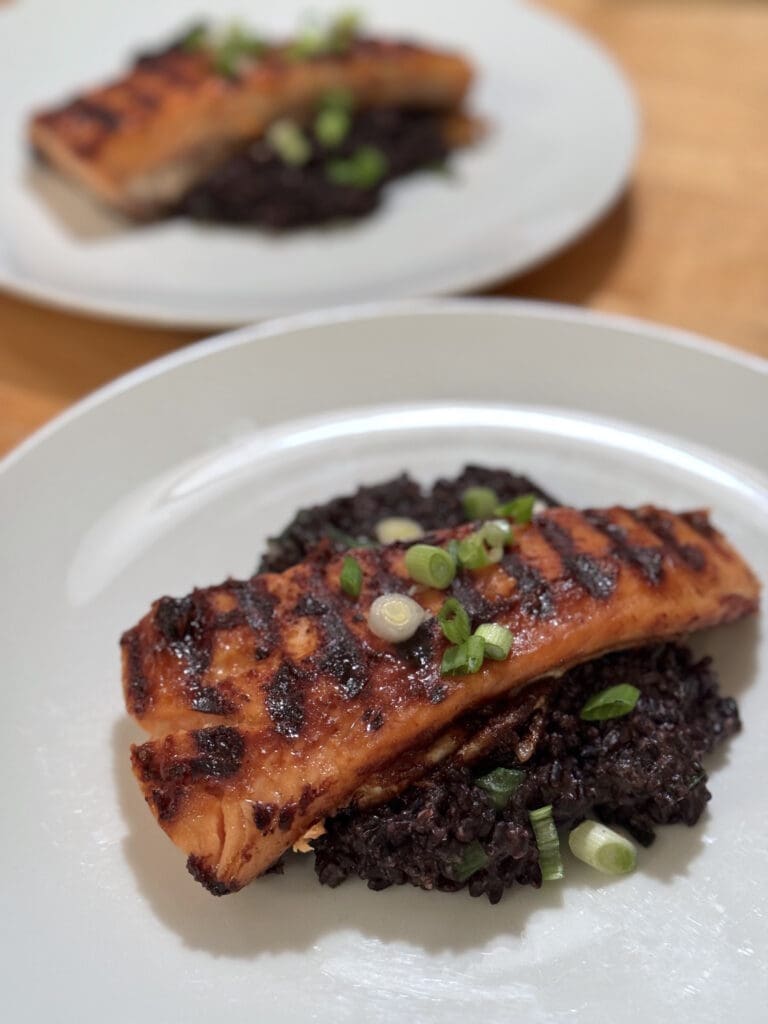
For my taste, rice is always a great side with fish. But, jasmine rice or brown rice can get pretty dull after a while. I like to use forbidden rice (black rice) for both its taste and color. It’s got a lovely nutty flavor, yet isn’t as chewy as wild rice. It also makes for…
Read More